
Getting your first gaming PC is one of those decisions that sticks with you. It’s not just about playing games, it’s about unlocking frame rates you’ve never seen on a console, cranking settings to ultra, and having the freedom to tweak, upgrade, and customize your entire experience. But if you’re standing at the edge of PC gaming, staring at motherboard specs and GPU benchmarks, it’s easy to feel overwhelmed.
This guide cuts through the noise. Whether you’re leaning toward a pre-built machine or ready to roll up your sleeves and build your own, you’ll find practical, 2026-relevant advice on components, budgets, peripherals, and optimization. No filler, no fluff, just the information you need to make a confident choice and start gaming.
Key Takeaways
- Your first gaming PC unlocks frame rates, customization, and upgradeability far beyond what consoles offer, with the ability to achieve 120+ FPS at ultra settings and evolve your hardware over years instead of becoming obsolete every 6-8 years.
- Decide between pre-built systems for convenience and warranty peace of mind, or build your own gaming PC to save 10-20% and gain full control over component selection and performance priorities.
- Allocate 35-50% of your budget to the GPU as your most critical component, then balance with a compatible mid-tier CPU, 16-32GB DDR5 RAM, and a fast NVMe SSD to avoid bottlenecks and maximize gaming performance.
- Mid-range gaming PCs ($900-$1,500) offer the best price-to-performance value with 1440p gaming at high-to-ultra settings and future-proofing for 3-4 years, while entry-level builds ($600-$900) excel for 1080p and competitive esports titles.
- When building your first gaming PC, use PCPartPicker for compatibility checks, avoid beginner mistakes like forgetting motherboard standoffs or not connecting CPU power cables, and take 2-4 hours for assembly rather than rushing through.
- Pair your new gaming PC with a 144Hz+ monitor and quality peripherals matching your GPU’s capabilities, then optimize settings using DLSS or FSR technology, enable XMP/EXPO in BIOS, and plan strategic upgrades starting with the GPU every 2-4 years.
Why Your First Gaming PC Is a Game-Changer
Switching to PC gaming means stepping into a different league entirely. Console gamers are locked into fixed hardware cycles, limited graphical settings, and closed ecosystems. A gaming PC gives you control over everything, from resolution and frame rate to mod support and multi-monitor setups.
The performance gap is real. Where consoles might target 60 FPS at 1440p with compromises, a properly configured gaming PC can push 120+ FPS at ultra settings, depending on the game and hardware. Competitive players especially benefit from lower input lag, higher refresh rates, and the precision of keyboard-and-mouse controls.
Beyond raw performance, PC gaming opens doors to platform exclusives, early access titles, indie games, and entire genres (like strategy and simulation games) that thrive on PC. You’re also not paying for online multiplayer access, no subscription walls like PlayStation Plus or Xbox Game Pass Core.
And then there’s upgradeability. Consoles become obsolete every 6-8 years. A gaming PC can evolve with you. Swap the GPU in two years, add more RAM, upgrade storage, your investment lasts longer and adapts to your needs.
Pre-Built vs. Custom Built: Which Path Is Right for Your First Gaming PC?
This is the first fork in the road, and there’s no universal right answer. Both routes have real advantages depending on your experience, budget, and how much you value plug-and-play convenience versus long-term value.
Advantages of Pre-Built Gaming PCs for Beginners
Pre-builts are the fastest route from zero to gaming. You order, unbox, plug in, and start playing, usually within an hour. For first-timers who don’t want to troubleshoot BIOS settings or worry about static discharge, that’s a massive appeal.
Many pre-built systems in 2026 come from reputable brands like NZXT, Alienware, or CyberPowerPC, and they include warranties that cover the entire system. If something breaks, you’re not diagnosing which component failed, you just contact support. This peace of mind is worth paying for if you’re risk-averse.
Pre-builts also simplify compatibility. You don’t need to cross-check motherboard chipsets, power supply wattages, or CPU cooler clearances. Everything is tested and guaranteed to work together. For someone who just wants to game and not become a hardware enthusiast, this is a clean, low-friction entry point.
The downside? You usually pay a premium for the convenience, anywhere from $100 to $300 more than building yourself. And pre-builts sometimes cut corners on RAM speed, PSU quality, or motherboard features to hit price targets.
Why Building Your Own PC Offers Better Value and Customization
Building a PC is intimidating at first, but it’s more straightforward than most people think, especially with the wealth of YouTube tutorials and compatibility-check tools like PCPartPicker available in 2026. And the payoff is significant.
You control every component. Want faster RAM? A quieter cooler? RGB lighting or a minimalist black box? It’s all your call. You’re not stuck with a flashy case you didn’t pick or a PSU that barely meets spec.
You also save money. Building your own gaming PC typically costs 10-20% less than an equivalent pre-built, and that savings compounds if you’re aiming for mid-range or high-end specs. You can also prioritize what matters most to you, putting more budget into the GPU if you’re chasing frames, or into the CPU if you stream or edit video.
The process itself teaches you how your PC works. When you inevitably upgrade or troubleshoot down the line, you’ll already know where everything is and how it connects. That confidence is invaluable.
The learning curve is real, and assembly takes 2-4 hours your first time. But if you’re willing to invest an afternoon, building delivers better value and a deeper sense of ownership.
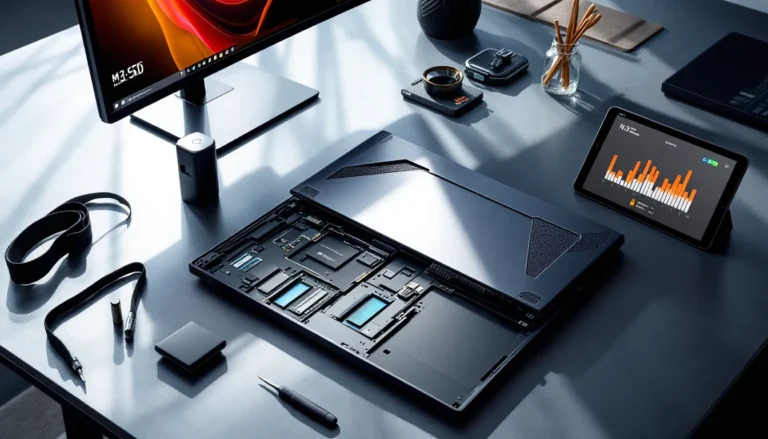
Understanding the Essential Components of a Gaming PC
A gaming PC is a collection of specialized parts working in harmony. Understanding what each component does, and where to spend your budget, is critical to making smart choices.
Graphics Card (GPU): The Heart of Gaming Performance
Your GPU is the single most important component for gaming. It handles rendering frames, textures, lighting, and effects. A weak GPU bottlenecks everything else, no matter how powerful your CPU or RAM.
As of early 2026, NVIDIA’s RTX 50-series and AMD’s RX 8000-series dominate the market. The RTX 5060 is a solid entry-level card for 1080p gaming at high settings, while the RTX 5070 and RX 8700 XT push into 1440p territory with ray tracing enabled. For 4K gaming or future-proofing, you’re looking at the RTX 5080 or higher.
VRAM matters, especially at higher resolutions. For 1080p, 8GB is acceptable but 12GB is safer. At 1440p or 4K, 12GB is the baseline, with 16GB+ being ideal for demanding titles and texture packs.
Expect to allocate 35-50% of your total budget to the GPU. It’s where you get the most noticeable performance return, and it’s often the first component you’ll upgrade in 2-3 years.
Processor (CPU): Balancing Gaming and Multitasking
The CPU handles game logic, physics, AI, and background tasks like Discord, streaming, or browser tabs. Modern games are increasingly multi-threaded, so core count matters, but clock speed and IPC (instructions per cycle) are still critical for high frame rates.
Intel’s 15th-gen chips (Core Ultra series) and AMD’s Ryzen 9000-series are the current standards. For gaming-focused builds, a Ryzen 7 9700X or Intel Core Ultra 5 265K offers excellent 1080p and 1440p performance without very costly. If you stream, edit, or run productivity software alongside gaming, step up to a Ryzen 9 9900X or Core Ultra 7 285K for the extra cores.
Don’t overbuy here. A $500 CPU won’t help you if you paired it with a $250 GPU. Balance is everything.
RAM, Storage, and Other Critical Components
RAM: 16GB is the minimum for gaming in 2026, but 32GB is becoming the sweet spot, especially for multitasking or playing memory-hungry titles like Cities: Skylines II or heavily modded games. DDR5 is now the standard, with speeds of 6000 MT/s or higher offering measurable gains on AMD and Intel platforms.
Storage: An NVMe SSD is non-negotiable. Games like Starfield or Cyberpunk 2077 load in seconds on a fast SSD versus painfully slow on an HDD. A 1TB Gen4 NVMe drive (like the Samsung 990 Pro or WD Black SN850X) should be your baseline. Add a 2TB HDD later if you need mass storage for older games.
Power Supply (PSU): Don’t cheap out here. A quality 650W-750W 80+ Gold PSU from Corsair, Seasonic, or EVGA ensures stable power delivery and protects your components. Modular cables make cable management easier, especially in your first build.
Motherboard: Choose based on your CPU socket (AM5 for AMD, LGA1851 for Intel) and the features you need, PCIe 5.0 support, Wi-Fi 7, RGB headers, or extra M.2 slots. A solid B850 (AMD) or Z890 (Intel) board covers most use cases.
Case: Pick something with good airflow, cable management space, and enough room for your GPU. Brands like Fractal Design, Lian Li, and Corsair offer beginner-friendly cases in 2026.
Cooling: The stock cooler that comes with some CPUs works, but an aftermarket tower cooler (like the Thermalright Peerless Assassin or Noctua NH-D15) or a 240mm AIO liquid cooler keeps temps lower and noise down.
Setting Your Budget: What to Expect at Different Price Points
Budgeting for a gaming PC is all about aligning expectations with reality. Here’s what you can realistically achieve at each tier in 2026.
Entry-Level Gaming PCs ($600-$900)
This range gets you into 1080p gaming at medium-to-high settings with respectable frame rates in most titles. Don’t expect ray tracing or 144 FPS in AAA games, but esports titles like Valorant, CS2, and Apex Legends will run beautifully.
Typical specs:
- GPU: RTX 5050, RX 8600, or RTX 4060 (if you find a deal)
- CPU: Ryzen 5 9600 or Intel Core Ultra 5 245K
- RAM: 16GB DDR5
- Storage: 512GB NVMe SSD
- PSU: 550W 80+ Bronze or Gold
This tier is perfect for casual gamers, students, or anyone transitioning from console or laptop gaming. You can always upgrade the GPU or add more storage down the line.
Mid-Range Gaming PCs ($900-$1500)
The sweet spot for most gamers. This budget delivers 1440p gaming at high-to-ultra settings, 100+ FPS in competitive games, and solid ray tracing performance in supported titles. You’re also future-proofed for the next 3-4 years with room to grow.
Typical specs:
- GPU: RTX 5070, RX 8700 XT
- CPU: Ryzen 7 9700X or Core Ultra 7 275K
- RAM: 32GB DDR5
- Storage: 1TB Gen4 NVMe SSD
- PSU: 750W 80+ Gold
This is where price-to-performance peaks. You’re not paying the premium for diminishing returns like you do at the high end, but you’re also not making compromises that hurt the experience.
High-End Gaming PCs ($1500+)
If you want 4K gaming, ultra settings with ray tracing enabled, or extreme frame rates for competitive play on a 240Hz+ monitor, this is your tier. You’re also set for VR, content creation, and handling anything the next few years throw at you.
Typical specs:
- GPU: RTX 5080, RTX 5090, or RX 8900 XT
- CPU: Ryzen 9 9900X or Core Ultra 9 295K
- RAM: 32GB-64GB DDR5 (6400 MT/s+)
- Storage: 2TB Gen4/Gen5 NVMe SSD
- PSU: 850W-1000W 80+ Platinum
You’re paying for top-tier performance and longevity. This is overkill for 1080p, but if you’re serious about gaming and have the budget, it’s an investment that lasts.
Step-by-Step Guide to Building Your First Gaming PC
Building a PC feels like a rite of passage, and it’s more approachable than ever in 2026. Here’s how to go from parts list to powered-on system.
Choosing Compatible Parts for Your Build
Start with PCPartPicker. It’s an invaluable tool that checks compatibility between components, flags issues like inadequate PSU wattage or case clearance, and shows price comparisons across retailers.
Step-by-step selection process:
- Pick your GPU first. This anchors your budget and defines your performance target.
- Choose a CPU that won’t bottleneck your GPU. For most GPUs in the RTX 5060-5070 range, a mid-tier Ryzen 7 or Core Ultra 5/7 is perfect.
- Select a compatible motherboard. Match the CPU socket and chipset, then check for the features you need (Wi-Fi, RGB, enough USB ports, M.2 slots).
- Add RAM. Two sticks (2x8GB or 2x16GB) in dual-channel configuration. Check your motherboard’s QVL (Qualified Vendor List) to ensure compatibility and speed support.
- Pick storage. Prioritize a fast NVMe SSD for your OS and games.
- Choose a PSU. Use a PSU calculator to estimate wattage, then add 100-150W headroom. Stick with reputable brands.
- Select a case that fits your motherboard size (ATX, Micro-ATX, Mini-ITX) and has good airflow.
- Add cooling. Check CPU cooler height clearance in your case specs.
Once your list is finalized and compatibility is confirmed, order everything. Having all parts on hand before you start assembly prevents frustrating delays.
Assembly Tips and Common Beginner Mistakes to Avoid
Before you start:
- Clear a large, clean workspace (a wooden table is ideal).
- Ground yourself to avoid static discharge, touch a metal object or wear an anti-static wrist strap.
- Have a Phillips-head screwdriver ready (magnetic tip helps).
- Watch a recent build guide on YouTube (channels like JayzTwoCents or Linus Tech Tips are great).
Assembly order:
- Install the PSU in the case (fan facing down if there’s a bottom vent).
- Install I/O shield for the motherboard.
- Mount motherboard standoffs in the case, then screw in the motherboard.
- Install the CPU on the motherboard (align the triangle marker, don’t force it).
- Apply thermal paste (a small pea-sized dot in the center) and mount the CPU cooler.
- Install RAM in the correct slots (usually slots 2 and 4 for dual-channel: check your motherboard manual).
- Install the M.2 SSD in the motherboard slot, secure with the screw.
- Install the GPU in the top PCIe x16 slot. Remove slot covers from the case, insert the GPU, and screw it in. Connect PCIe power cables from the PSU.
- Connect all cables: 24-pin ATX power to motherboard, 8-pin CPU power, SATA power/data for any HDDs, case front panel connectors (power button, USB, audio).
- Double-check everything. Reseat the RAM and GPU if needed. Make sure no cables block fans.
- Power on. If it doesn’t boot, don’t panic, reseat RAM and GPU, check all power connections.
Common beginner mistakes:
- Forgetting to install motherboard standoffs (shorts the board).
- Not connecting the 8-pin CPU power cable (PC won’t boot).
- Installing RAM in the wrong slots (won’t run in dual-channel).
- Forgetting to remove the plastic peel from the CPU cooler base (overheating).
- Not plugging the monitor into the GPU (plugging into motherboard HDMI gives no signal if you have a discrete GPU).
Take your time. Most first builds take 2-4 hours. Rushing leads to mistakes.
Top Pre-Built Gaming PC Recommendations for 2026
If you’ve decided a pre-built is the better route, here are some of the best options available in early 2026 across different budgets. These systems offer solid value, quality components, and reliable support.
Entry-Level:
- NZXT Player One (RTX 5050 model) – Around $750. Clean design, good cable management, Ryzen 5 9600 CPU, 16GB DDR5, 512GB SSD. Great for 1080p gaming and comes with a 2-year warranty.
- CyberPowerPC Gamer Xtreme – Around $800. Often on sale, includes RTX 5050 or RX 8600, Core Ultra 5, 16GB RAM, and RGB fans. Solid budget pick.
Mid-Range:
- NZXT Player Two (RTX 5070 model) – Around $1,300. Ryzen 7 9700X, 32GB DDR5, 1TB NVMe, excellent airflow case. One of the cleanest pre-builts for the price.
- Alienware Aurora R16 – Around $1,400. Premium build quality, Core Ultra 7, RTX 5070, 32GB RAM, unique toolless design for easy upgrades. Dell’s support is responsive.
- Maingear MG-1 – Around $1,500. Fully customizable pre-built with lifetime labor warranty. Hand-built in the US with quality components and clean cable management.
High-End:
- Corsair Vengeance i8200 – Around $2,500. RTX 5080, Ryzen 9 9900X, 64GB DDR5, 2TB Gen4 SSD, liquid cooling. Packed with performance and Corsair’s iCUE ecosystem for RGB and monitoring.
- Origin PC Neuron – Starting around $2,800. Fully custom-built with lifetime support, premium cable sleeving, and overclocking options. You’re paying for top-tier craftsmanship and white-glove service.
All of these systems are available from the manufacturers’ websites or major retailers like Best Buy, Amazon, and Newegg. Watch for sales during events like Black Friday, back-to-school season, or new GPU launches, discounts can be significant.
Monitors, Peripherals, and Accessories to Complete Your Setup
Your PC is only half the equation. The monitor, keyboard, mouse, and headset shape your entire gaming experience, and there’s no point in a high-end GPU if you’re stuck with a 60Hz 1080p monitor from 2015.
Selecting the Right Gaming Monitor for Your PC
Match your monitor to your GPU’s capabilities. A 1080p 144Hz monitor pairs perfectly with entry-level GPUs like the RTX 5050 or RX 8600. Mid-range GPUs (RTX 5070, RX 8700 XT) shine on 1440p 144-165Hz displays. High-end GPUs like the RTX 5080 or 5090 justify 4K 144Hz or ultrawide 1440p monitors.
Key specs to consider:
- Refresh rate: 144Hz is the baseline for smooth, responsive gaming. 240Hz+ is for competitive FPS players chasing every edge.
- Response time: 1ms GtG (gray-to-gray) minimizes motion blur and ghosting.
- Panel type: IPS offers the best color accuracy and viewing angles. VA panels have deeper blacks but slower response times. TN panels are fast but have poor color and angles (mostly outdated by 2026).
- Adaptive sync: FreeSync (AMD) and G-Sync (NVIDIA) eliminate screen tearing. Most monitors in 2026 support both.
- HDR: Look for DisplayHDR 600 or higher for meaningful HDR performance. Lower certifications are mostly marketing.
Recommended monitors for 2026:
- 1080p 144Hz: AOC 24G2, LG UltraGear 24GN60 – Around $150-$200.
- 1440p 165Hz: Dell S2722DGM, Gigabyte M27Q X – Around $300-$400.
- 4K 144Hz: LG 27GP950, ASUS ROG Swift PG32UQX – Around $700-$1,200.
According to testing from Tom’s Hardware, monitor input lag and refresh rate have a measurable impact on competitive performance, especially in fast-paced shooters.
Keyboards, Mice, and Headsets Worth the Investment
Gaming Keyboards:
Mechanical keyboards are the gold standard. Switches come in three main types:
- Linear (Red switches): Smooth, quiet, favored by gamers.
- Tactile (Brown switches): Slight bump, good for typing and gaming.
- Clicky (Blue switches): Loud, satisfying click, better for typing than gaming.
Popular picks: Keychron Q1 Pro ($180), SteelSeries Apex Pro ($200), Razer BlackWidow V4 ($150). If you’re on a budget, the Redragon K552 ($40) is a solid starter.
Gaming Mice:
Sensor quality, weight, and shape matter more than RGB and extra buttons. A good mouse should feel like an extension of your hand.
Top options: Logitech G Pro X Superlight 2 ($150, wireless, 60g, best for FPS), Razer DeathAdder V3 ($70, ergonomic, great all-rounder), Glorious Model O 2 ($80, lightweight, popular with esports players).
DPI isn’t everything, most pros play at 400-800 DPI with large mousepads for precision.
Gaming Headsets:
Spatial audio and mic quality separate good headsets from great ones. Look for comfortable ear cups, especially for long sessions.
Solid choices: SteelSeries Arctis Nova Pro ($250, premium build, swappable batteries), HyperX Cloud III ($100, excellent value, comfortable), Razer BlackShark V2 ($100, THX spatial audio, good mic).
If you’re serious about audio, consider separating the headset from the mic, grab a quality pair of headphones (like the Sennheiser HD 560S) and a standalone mic (like the Blue Yeti or Audio-Technica AT2020).
Other accessories:
- Mousepad: Large cloth pad (SteelSeries QcK Heavy, Logitech G640) for low-DPI gaming.
- Cable management: Velcro ties or cable sleeves keep your setup clean.
- Monitor arm: Frees up desk space and improves ergonomics.
- Surge protector: Protects your investment from power spikes.
Optimizing Your First Gaming PC for Maximum Performance
Unboxing your new PC is exciting, but there’s critical setup work to do before you jump into gaming. Proper software configuration and settings optimization can unlock 10-30% more performance.
Software Setup: Drivers, Updates, and Essential Programs
First boot checklist:
- Install the latest GPU drivers. Download directly from NVIDIA (GeForce Experience or manual driver download) or AMD (Adrenalin software). Outdated drivers cause crashes, stuttering, and poor performance.
- Update Windows. Go to Settings > Windows Update and install all pending updates. This includes critical security patches and hardware compatibility fixes.
- Enable XMP/EXPO in BIOS. Restart your PC, enter BIOS (usually Delete or F2 key during boot), and enable the XMP (Intel) or EXPO (AMD) profile for your RAM. This ensures it runs at its rated speed instead of the default 4800 MT/s.
- Install chipset drivers. Download from your motherboard manufacturer’s website (ASUS, MSI, Gigabyte, ASRock). These optimize communication between components.
- Update BIOS (optional but recommended). Check your motherboard’s support page for the latest BIOS version. Follow the instructions carefully, never power off during a BIOS update.
Essential programs:
- MSI Afterburner: Monitor GPU temps, usage, and FPS. Also used for overclocking.
- HWiNFO64: Detailed hardware monitoring and sensor logging.
- Discord: Communication with friends and gaming communities.
- OBS Studio: If you plan to stream or record gameplay.
- Steam, Epic Games, GOG Galaxy: Game libraries and launchers.
Disable bloatware: Uninstall unnecessary pre-installed software (trial antivirus, manufacturer utilities you won’t use). Use Windows Settings > Apps to remove them.
Many gamers overlook creating a retro gaming setup to complement their modern rig, but emulation and classic titles run flawlessly on even entry-level hardware.
Graphics Settings and In-Game Optimization
Every game has different performance demands. Here’s how to balance visuals and frame rate.
General optimization tips:
- Resolution: Stick to your monitor’s native resolution (upscaling often looks blurry). If FPS is low, use DLSS (NVIDIA) or FSR (AMD) instead of lowering resolution.
- Texture quality: Set to High or Ultra if you have 8GB+ VRAM. Minimal FPS impact, huge visual difference.
- Shadows: One of the most performance-heavy settings. Dropping from Ultra to High saves 10-15 FPS with minimal visual loss.
- Anti-aliasing: TAA or SMAA are efficient. Avoid MSAA/SSAA (too expensive). DLAA (NVIDIA) offers high-quality AA with DLSS.
- Ray tracing: Beautiful but demanding. Enable if you have RTX 5070+ and use DLSS/FSR to maintain FPS. Otherwise, disable it.
- Motion blur & depth of field: Personal preference, but most competitive gamers disable both for clarity.
- V-Sync: Turn off and use G-Sync/FreeSync instead to avoid input lag.
Target frame rates:
- Competitive FPS (Valorant, CS2, Apex): Aim for 144+ FPS, lower settings if needed.
- AAA single-player (Cyberpunk, Starfield): 60 FPS minimum, 100+ FPS ideal at 1440p.
- Strategy/RPG: 60 FPS is fine: prioritize visuals.
Use the in-game benchmarking tools (most modern games include them) to test settings before committing. Adjust until you hit your target FPS consistently.
According to analysis from PC Gamer, DLSS 3.5 and FSR 3.1 can nearly double frame rates in supported titles with minimal quality loss, making them essential tools for anyone building their first gaming pc.
Maintaining and Upgrading Your Gaming PC Over Time
A gaming PC isn’t a one-and-done purchase. Regular maintenance and smart upgrades keep it running optimally for years.
Maintenance schedule:
- Monthly: Check temps during gaming (GPU shouldn’t exceed 80-85°C, CPU 75-80°C). If temps spike, clean dust filters.
- Every 3-6 months: Open the case and blow out dust with compressed air (short bursts, hold fans still to avoid damage). Focus on GPU, CPU cooler, intake fans, and PSU.
- Yearly: Reapply thermal paste on the CPU if temps have crept up. Replace case fans if they’re noisy or failing.
Software maintenance:
- Keep GPU drivers updated (NVIDIA/AMD release game-ready drivers for major launches).
- Run occasional malware scans with Windows Defender or Malwarebytes.
- Defragment HDDs (SSDs don’t need defragging).
- Clear temp files and unused programs to free up storage.
Upgrade path:
The beauty of PC gaming is modularity. Here’s the typical upgrade order based on impact:
- GPU (2-4 years): Biggest performance boost. Upgrading from an RTX 5060 to a 5070 or next-gen equivalent transforms your experience.
- RAM (3-5 years): If you started with 16GB, jump to 32GB when prices drop or if you notice stuttering in modern games.
- Storage (as needed): Add more NVMe or SATA SSDs when you run low on space. Prices per GB continue to fall.
- CPU (4-6 years): Upgrade when your CPU bottlenecks your new GPU. Check utilization in MSI Afterburner, if CPU is at 100% while GPU idles, it’s time.
- Monitor/peripherals (5+ years): Upgrade to higher refresh rate or resolution as GPU allows.
- Motherboard/RAM/CPU together (5-7 years): When a new platform launches (new socket, DDR6, etc.), you’ll often replace all three at once.
Never upgrade everything at once unless you’re building a new PC. Incremental upgrades spread the cost and keep your system current without massive one-time expenses.
Selling old parts: Sites like r/hardwareswap, eBay, or Facebook Marketplace make it easy to recoup 40-60% of original cost on used components. A GPU that cost $400 two years ago might still fetch $200, offsetting your new purchase.
Regular benchmarking from Hardware Times shows that even mid-range GPUs from 2024 hold value well into 2026, making strategic upgrades a financially smart way to keep pace with new releases.
Conclusion
Your first gaming PC is more than a machine, it’s your entry into a platform built on freedom, performance, and endless customization. Whether you go pre-built for convenience or build your own for value and experience, you’re making a choice that opens doors consoles simply can’t.
The learning curve is real, especially if you’re assembling components for the first time or tweaking BIOS settings. But that investment pays off in a deeper understanding of your hardware, better troubleshooting skills, and the confidence to upgrade and evolve your setup over time.
Start with a realistic budget, prioritize the GPU and monitor, don’t skip the quality-of-life upgrades (good peripherals, fast storage, adequate cooling), and remember that a gaming PC is never truly finished. It grows with you, one GPU upgrade, one peripheral swap, one settings tweak at a time.
Welcome to PC gaming. You’re going to love it here.